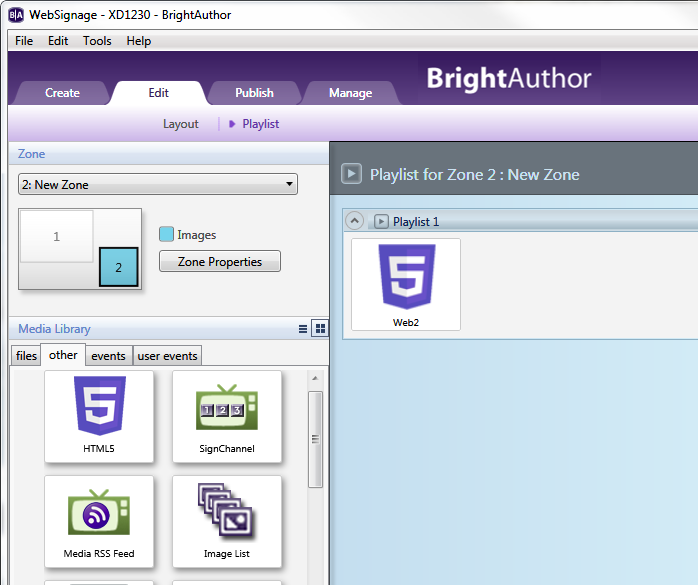
This section covers how to integrate HTML pages into BrightAuthor presentations. To add an HTML page to a presentation, click the other tab under Media Library, select the HTML5 state, and drag it into the playlist area. You will be prompted to add local HTML files or a remote page URL to your presentation.
The following are general rules for using HTML content in BrightAuthor:
You can have multiple zones containing HTML content in a BrightAuthor presentation.
HTML content can be inserted into a Video or Images zone or an Images Zone. You cannot use HTML content in a Video Only zone.
The dimensions of the HTML background/page must match the size of the zone in BrightAuthor: You cannot use background image scaling to fit zones of different sizes.

HTML content will show at the highest Z-level of graphics zones, meaning that an HTML zone will cover all other zones that contain images and text. This behavior does not extend to touch screens (see Integrating Touchscreen Content below for more details).
HTML content can be placed in front of or behind zones containing video content, depending on the Graphics plane z position setting of the zone containing the HTML content (configurable in the Edit > Layout tab).
If the HTML page contains video and the Enable native video plane playback option is enabled in the HTML5 state, the HTML page will always display over other video zones.
HTML content can originate from a remote server, a local server, or the local storage (SD card) of the player. Presentations containing HTML content can also be downloaded onto the local storage from the BrightSign Network.
If your HTML content relies on assets from multiple locations, make sure to check the Enable external data box when creating or editing an HTML5 state.
When creating an HTML5 state in BrightAuthor, click the Add Font button to add custom True Type Font (.ttf) files to the HTML page. This feature works for both local and remote HTML content.
When the presentation is published, the font file(s) will act as though they are located in the same file directory as the index.html file (i.e. they can be accessed with the standard font-family attribute in HTML/CSS).
Exporting a presentation that contains multiple HTML pages also exports in full all asset folders associated with those pages. If your pages share common asset folders, the entire contents will be duplicated multiple times. This can become problematic if your asset folders contain large content files, so you may need to prune and/or rearrange asset folders that are duplicated after export.
BrightAuthor allows you to configure common browser caching and storage functions on the player. To enable these functions, open your BrightAuthor HTML presentation and navigate to Edit > Preferences > Storage and check Limit storage space by function. You can allocate space for the following functions:
HTML data: The amount of space dedicated to the HTML application cache
HTML local storage: The amount of space dedicated to JavaScript variables and data
If you select Specify absolute size, it is possible to specify a combined set of segments that is larger or smaller than the absolute size of your storage device. If you select Specify percentages, you will need to ensure that the percentages add up to 100% (which is equivalent to the absolute size of the local storage on the player).
The HTML local storage feature is only available in BrightAuthor versions 4.1.1.12 and later. A similar feature is available in the File > Presentation Properties > HTML section in earlier versions.
The HTML local storage feature is only available in BrightAuthor versions 4.1.1.12 and later. A similar feature is available in the File > Presentation Properties > HTML section in earlier versions.
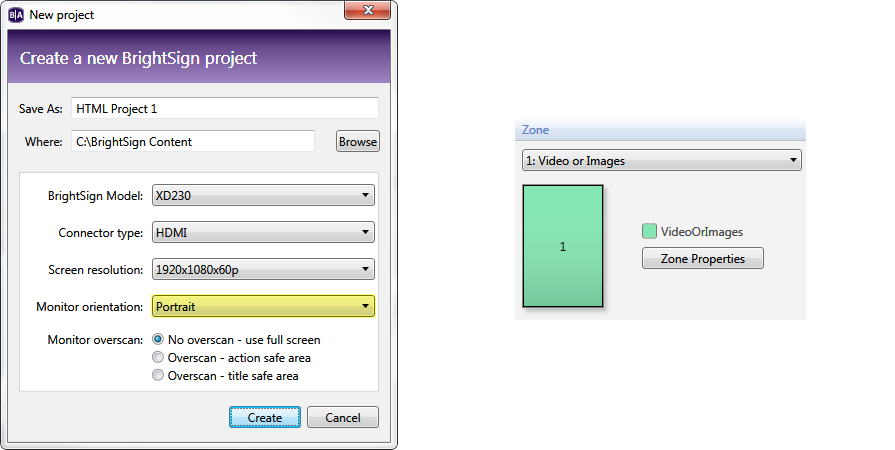
Follow these steps to create a digital-signage canvas that is portrait oriented:
These instructions apply to BrightAuthor versions 4.3.0.x and later. |
Edit the aspect ratio in your web authoring software (e.g. Dreamweaver) so that it is the reverse of your monitor/television resolution. For example, if you plan on displaying the portrait content in 1080p, set the resolution to 1080x1920 rather than 1920x1080.
Create a new presentation for your player in BrightAuthor.
Set the Monitor Orientation to Portrait. Click Create.
When prompted to select a template, choose Full screen.
Add your HTML content to the playlist.

You can enable touch-screen events for an HTML page by checking the Enable mouse and touch events box when creating an HTML5 state (see the HTML5 state description for more details).
BrightSign players are compatible with touchscreens that use standard HID drivers. Note that some manufacturers claim support for HID but still use custom drivers. See this FAQ for further discussion and a list of touchscreen models that have been tested with BrightSign players.
BrightSign players are compatible with touchscreens that use standard HID drivers. Note that some manufacturers claim support for HID but still use custom drivers. See this FAQ for further discussion and a list of touchscreen models that have been tested with BrightSign players.
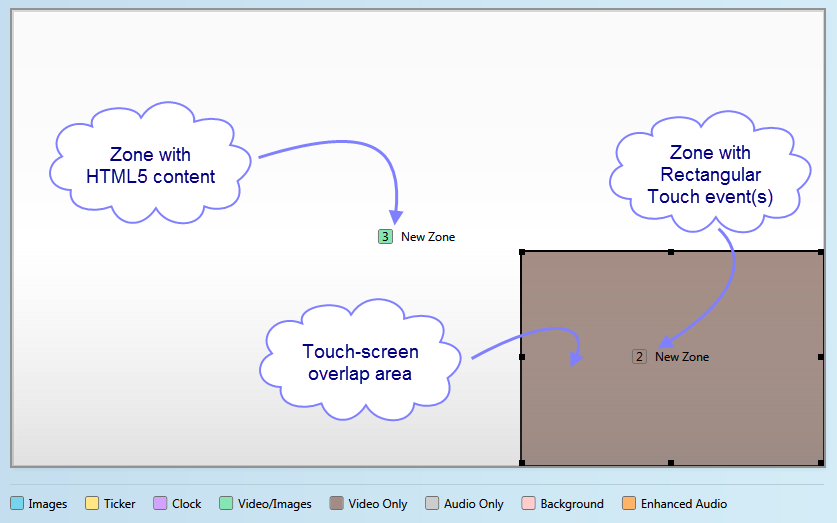
Note that touch events are received by both HTML pages and BrightAuthor Rectangular Touch events. Therefore, if you have a zone with an HTML page overlapping a zone containing a Rectangular Touch event, touching the area of overlap will send an event to both zones at the same time. This is the case even if one zone completely covers the other visually. Depending on the type of action triggered in each zone, touch-event overlap may cause crashing or other issues with presentation stability. Unless you are certain of the consequences, make sure that zones with touch-enabled HTML content and zones with Rectangular Touch events do not overlap.
Creating an overlap as shown below may have unintended consequences. |

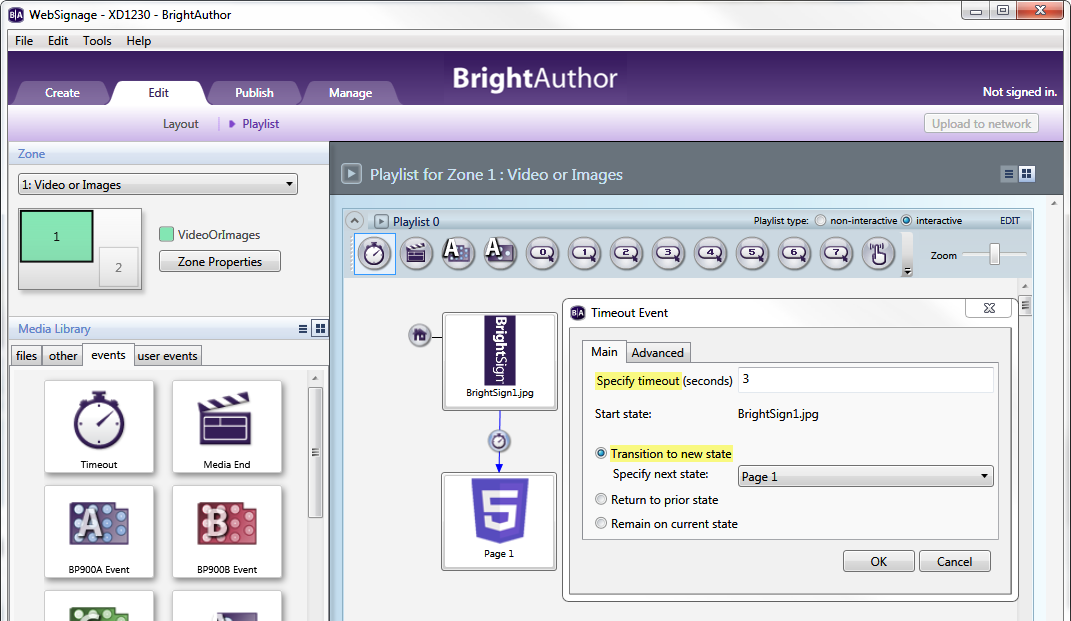
When the BrightSign player loads HTML content from a URL, there may be a delay based on network latency. You can add a preload image to sidestep this issue. Note that this solution is not necessary if all HTML assets are located on the local storage of the player.
Drag and drop an image file from your media library.
Check the Set as initial state box while editing the image state.
Add a Timeout event to this image.
Specify the timeout for three seconds (or more if desired).
Set the Timeout event to transition to the HTML5 state.

Browser scrollbars are disabled by default in BrightAuthor. To display scrollbars, reference this simple CSS file from your HTML page: