| Expand | ||
|---|---|---|
| ||
|
Introduction
This guide walks through the various available methods of using BrightAuthor:connected to set up a BrightSign player. After the player is set up, see BrightAuthor:connected Publishing Quickstart to create a simple presentation
and publish
Device Setup
BrightAuthor:connected offers multiple techniques for device setup and provisioning. This guide will cover two primary methods: physical and over the internet (network setup). For more detailed information and other options, consult this page.
Physical Setup
This setup method is recommended for players that do not need to be updated frequently. This method also requires an SD card and SD card adapter for your computer.
To set up your players using physical setup:
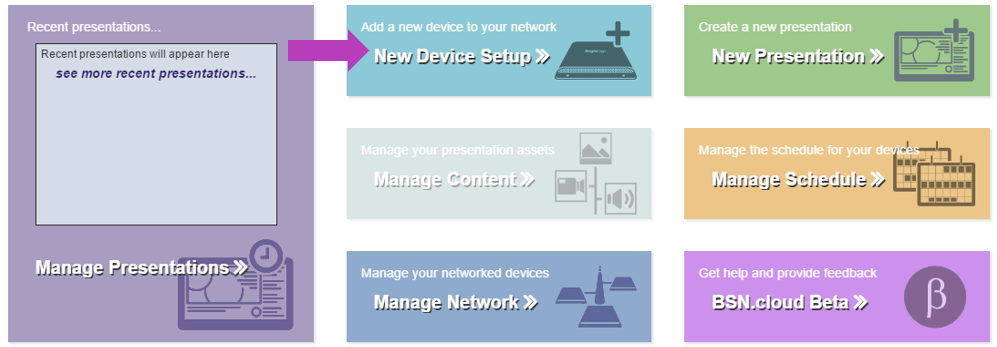
- Open BrightAuthor:connected and select New Device Setup from the Dashboard
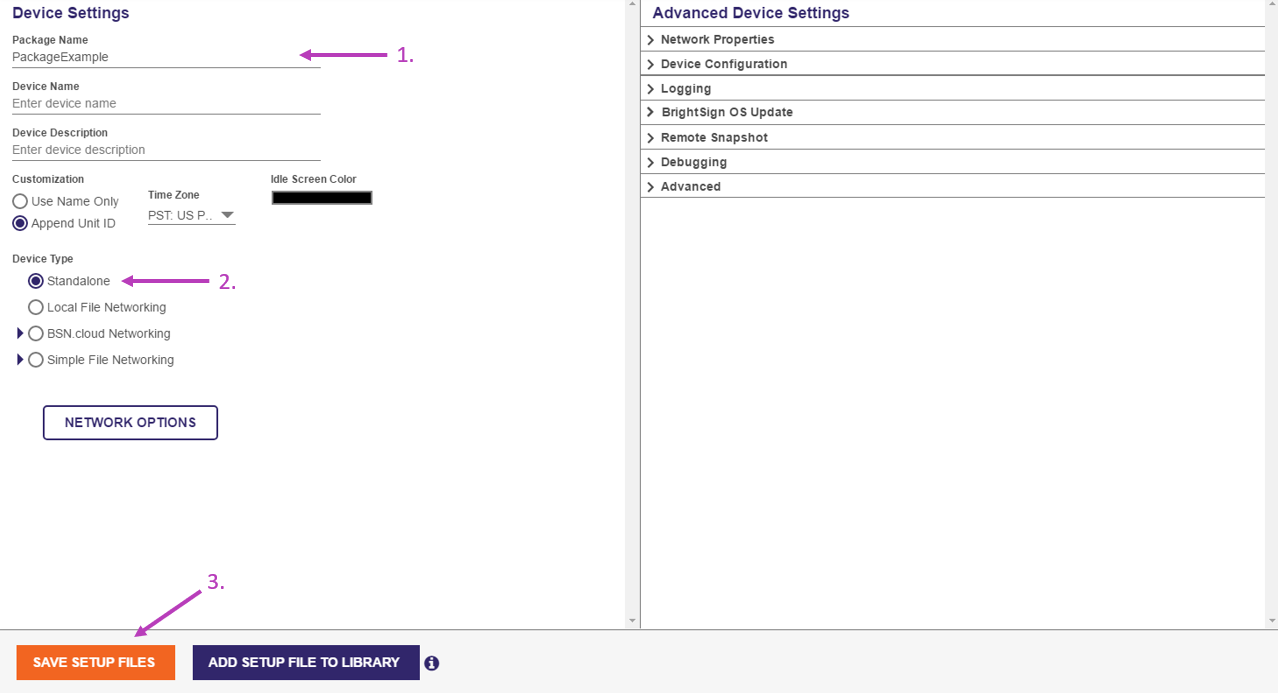
- Enter a Package Name and select Standalone under Device Type
- Select Save Setup Files to save the files onto a SD card.
The SD card is now ready to be put in the player. Since the player was not configured with any networking option, the SD card will need to be removed and updated with new software releases manually. Should internet connectivity become available, you can update the player to use networking options by following the steps below.
Network Setup
To use the network setup option, the player must have a connection to the local area network and then the device must be provisioned on the network. The player must also have a blank SD card inserted.
Connect to the Network
To connect to the local area network:
- Navigate from the Dashboard to New Device Setup .
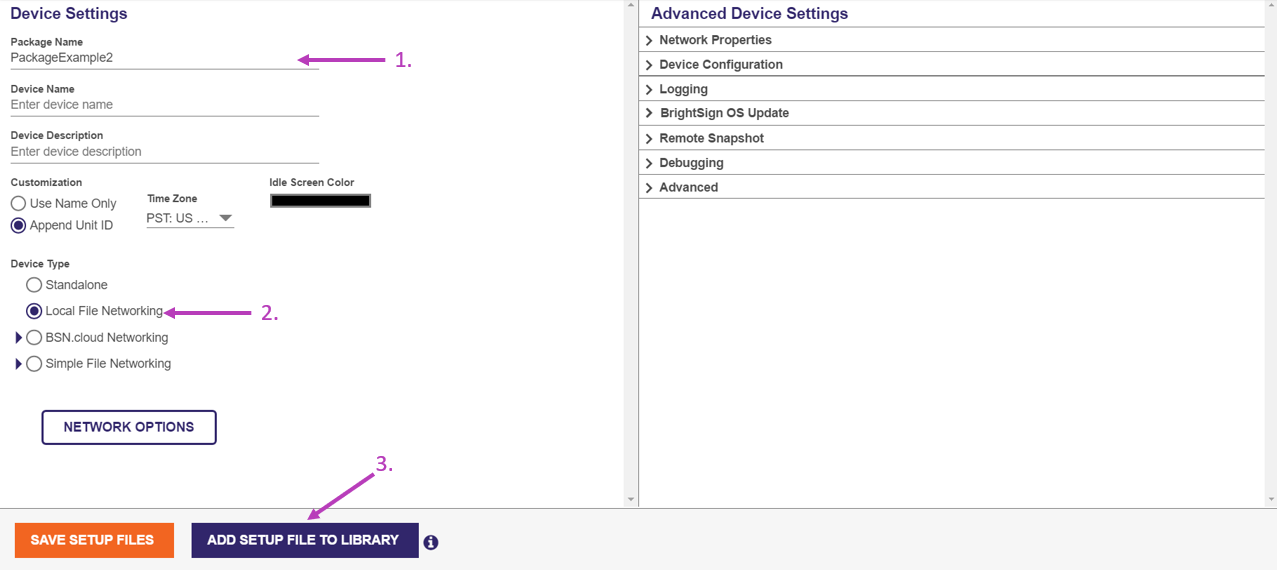
- Enter a Package Name.
- Select Local File Networking.
- Select Add Setup File to Library.
Add the Device to the Network
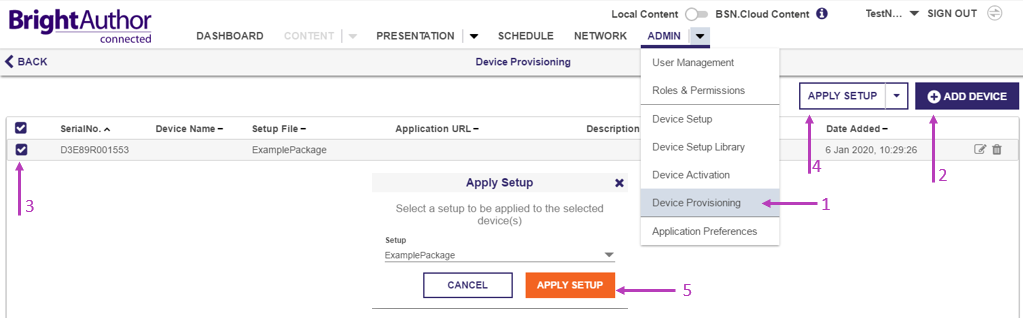
- Navigate through the Admin tab to Device Provisioning.
- Select Add Device and enter the player serial number (this is visible on the back of the box).
- Select the device by checking the box on the left.
- Select Apply Setup to apply the selected setup package to the player.
For information about how you can manage players in your network, see Network.
Creating A Presentation
Make a New Presentation
Now that the player has been set up, you can create a presentation. To do this:
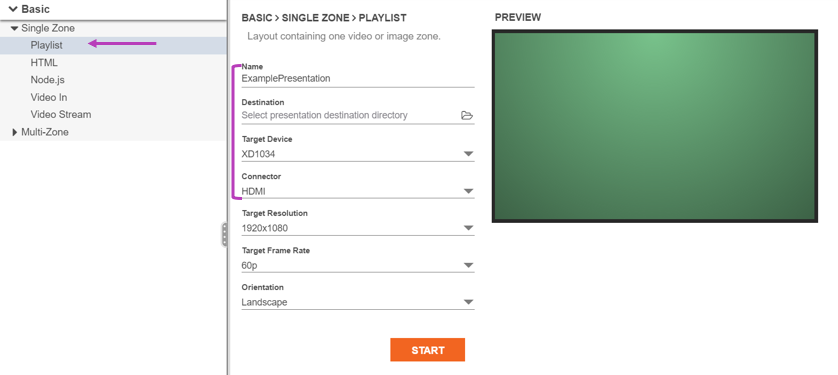
- Navigate to the Presentation tab and select New Presentation.
- Select Single Zone > Playlist as the presentation type.
- Enter the presentation name under Name
- Select a Destination folder
- Enter your BrightSign player model under Target Device
- Select a Connector type
- Select Start
Add Content to the Presentation
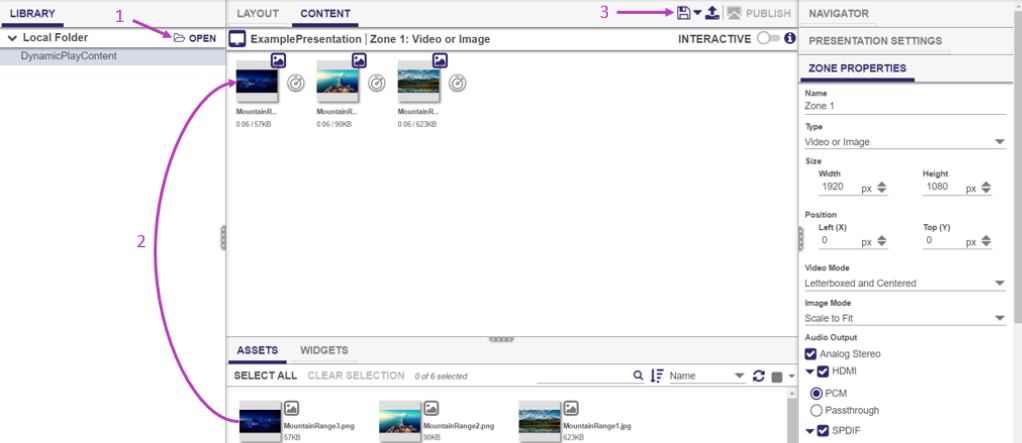
To add content to the presentation:
- Open the folder with the desired images or videos from the Library column. This will populate the Assets section of the Content tab.
- Drag assets to the Content plane
- Save the presentation to your SD card when you are done.
See Presentation and/or Content to get more information about what else you can do with your presentation and content in BrightAuthor:connected.
Further Learning
Now that the very basics are familiar, you can learn more about BrightAuthor:connected and its features on these pages or by viewing our tutorial video series. BrightAuthor:connected can also integrate with the BSN.cloud network, allowing authorized users to view the status of networked players through Control Cloud and to create and publish presentations directly over the internet with Content Cloud. You can learn more about BSN.cloud from our user guide.that presentation to a player for display.
Player Preparation
Requirements
A BrightSign player
A microSD or other storage device (a microSD card will be assumed for this guide). See Player Storage for more information.
A Mac or PC (additional requirement details can be found here)
A Display
An HDMI® cable
(optional) A microSD card adapter, if you are planning to transfer content from your computer to your player using a microSD card.
Connecting your Player
Prepare the microSD card by erasing its contents. Cards must be formatted as exFAT or FAT32.
Connect your BrightSign player to a power supply.
Connect the player to a display with the HDMI cable.
Put the blank microSD card in the player.
Make sure the player is connected to your local network with an ethernet cable. Ideally, you should also have internet access.
Publishing Mode
Players can be configured in a variety of “Publishing Modes” which reflect how content is delivered to the player. The Publishing Mode is covered in more detail here, but the main points are summarized in the table below for easier reference.
BrightAuthor:connected Publishing Modes | |
Standalone |
|
Local Network |
|
Web Folder |
|
Content Cloud |
|
Partner CMS Publishing Modes | |
Partner App |
|
App URL |
|
Player Setup
| Info |
|---|
Configurations involving the legacy BrightSignNetwork.com are not covered in this guide. |
Download, install, and launch the BrightAuthor:connected app on your Mac or PC.
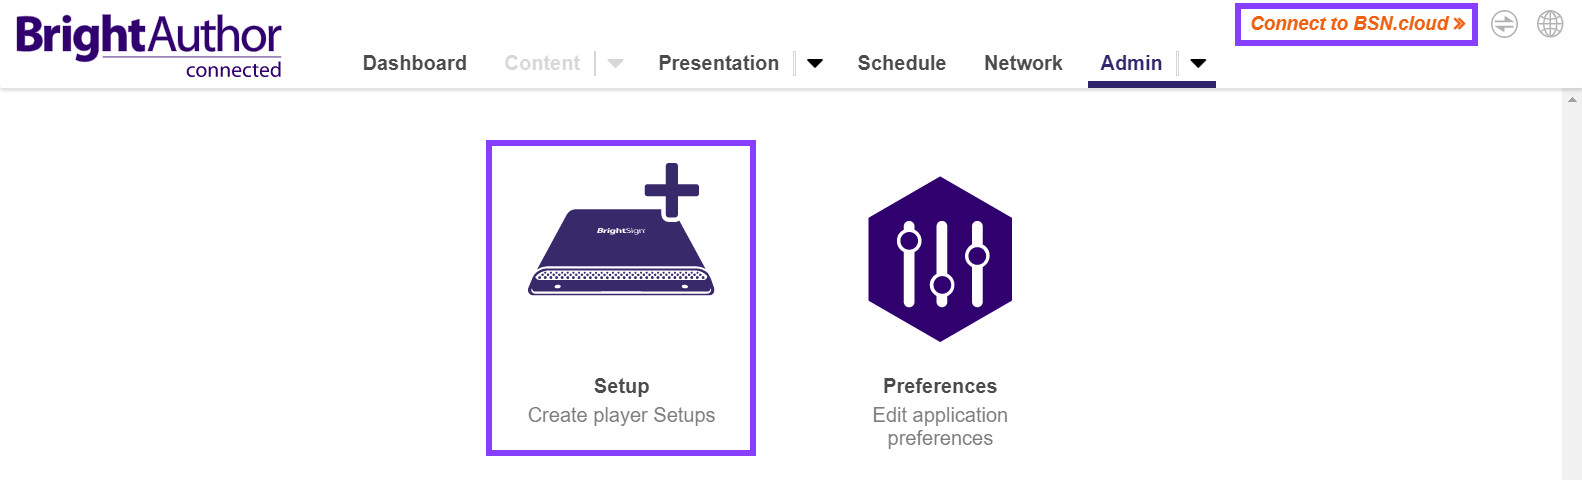
The BrightAuthor:connected Dashboard screen should appear, as shown above, indicating that you are not connected to BSN.cloud. While you do not need to connect to BSN.cloud to setup for Standalone, Local Network, or Web Folder, it is better to do so to get the full functionality of BrightAuthor:connected. You must create an account to use BSN.cloud setup. For information about how to create an account, see this page.
From the Admin tab, select Setup. Go to the page below for your preferred Setup type: