Creating BrightPlates Templates
- BrightSign TechDocs
ON THIS PAGE
This page outlines how to create and upload HTML templates for BrightPlates. These are advanced instructions intended for content developers.
Adobe Photoshop is used as the example content creation application, but other applications such as Gimp have similar functionality.
Tip
Download this .zip file for examples of functional BrightPlates templates.
Generating an HTML Template
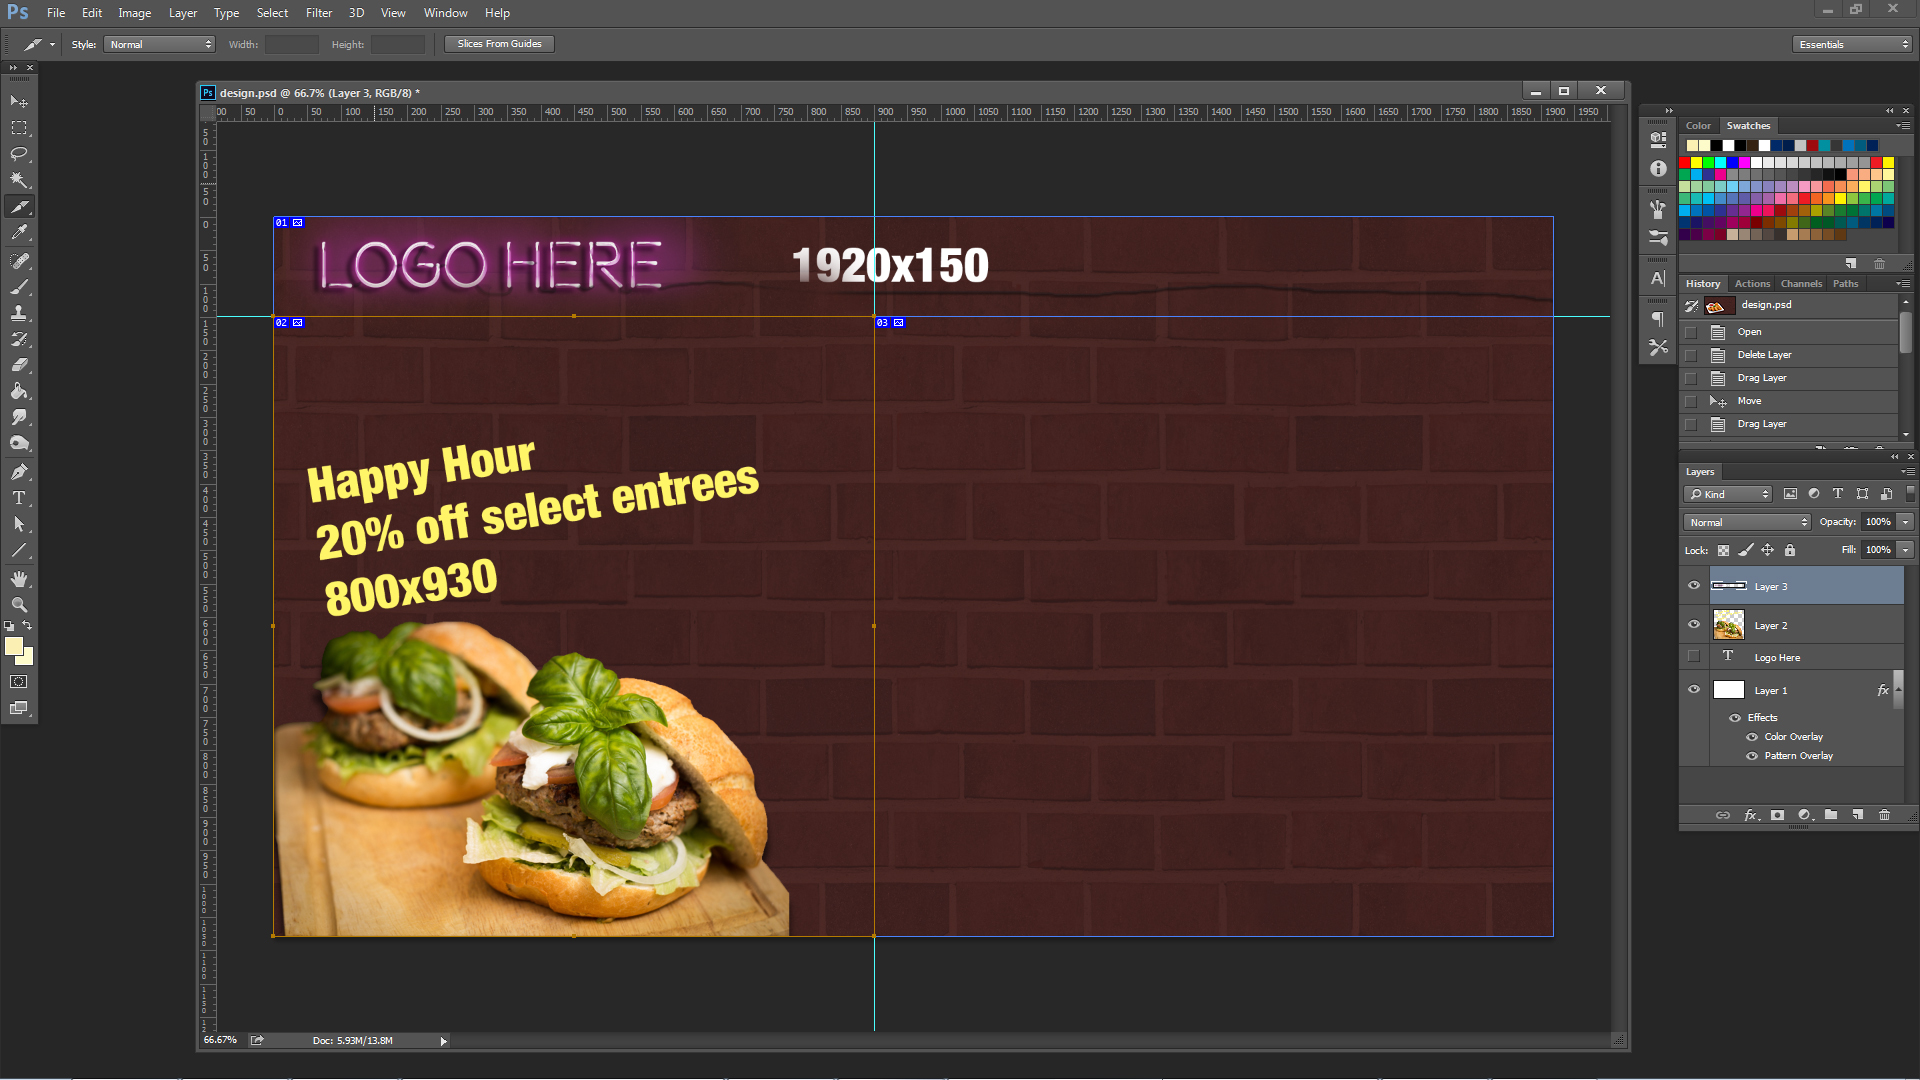
- Use Photoshop to open the content you wish to convert to a BrightPlates template. Ensure the dimensions of the workspace is either 1920x1080 (landscape) or 1080x1920 (portrait).
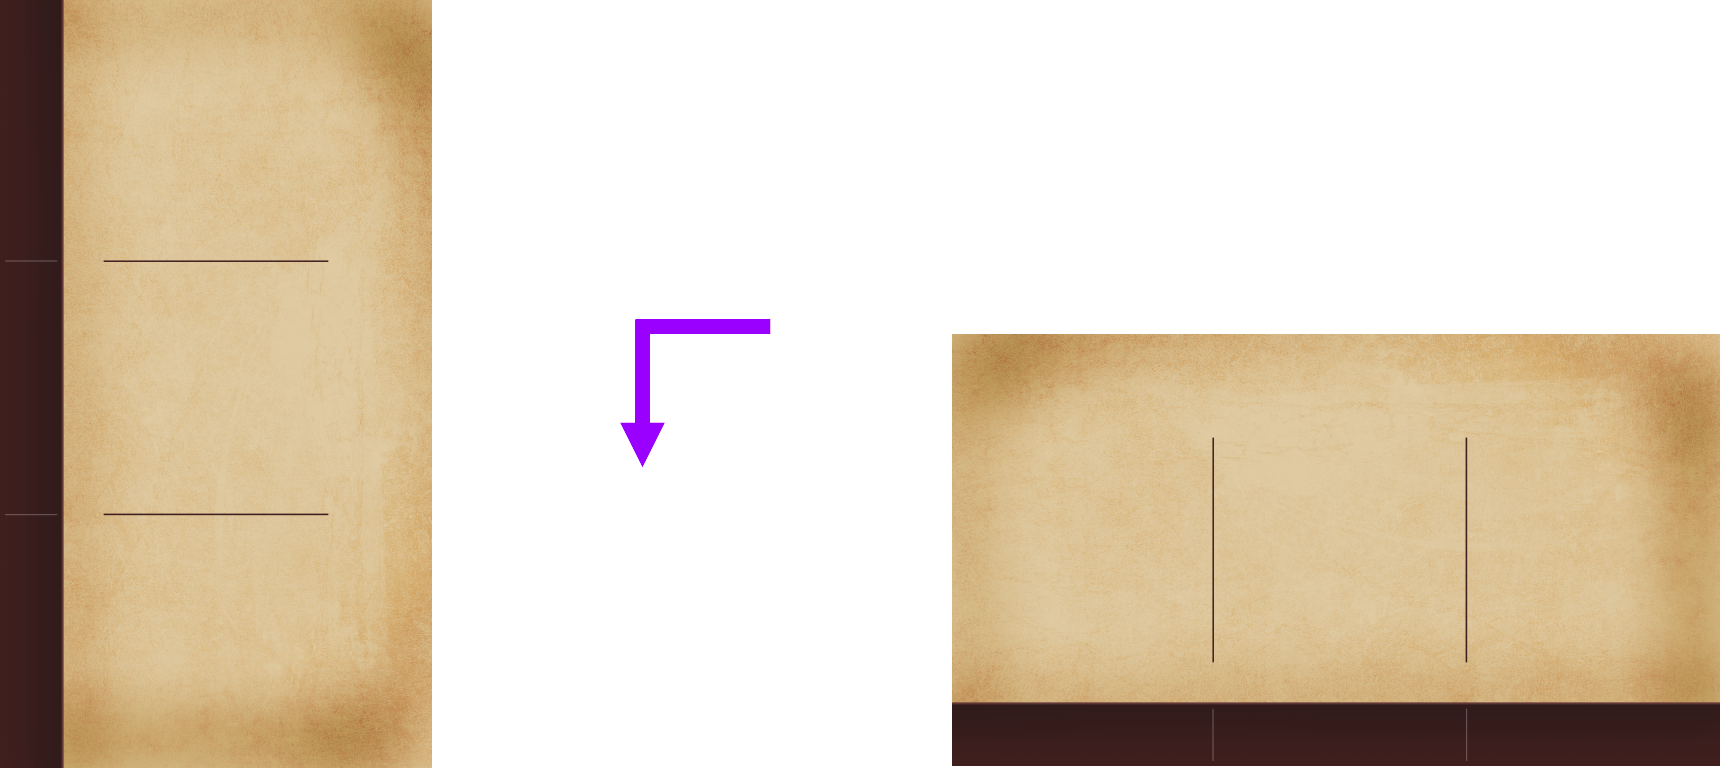
- Enable the Guides feature to create a zone for each dynamic area of the template: This includes dynamic feed areas and editable images.
- Use the Slice tool, along with the "snap to" feature, to create a slice for each zone. The slices will be named automatically using a number and the file name; however, the HTML editing steps (described below) will be easier if you give each slice a unique name according to its function (e.g. "weekly-specials-graphic", "menu-item-feed-1").
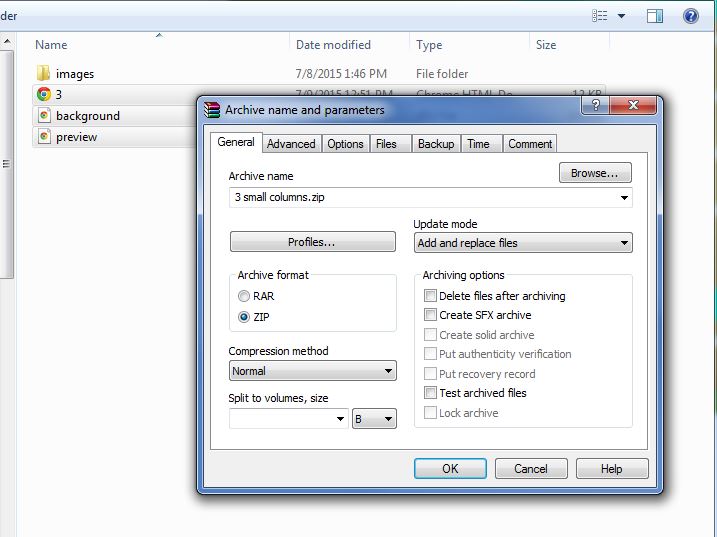
- Navigate to File > Save for Web and Devices.
Select all of the slices (i.e. zones) that you want to be part of the template.
Note
Areas that are not selected will automatically be included in the background image of the template.
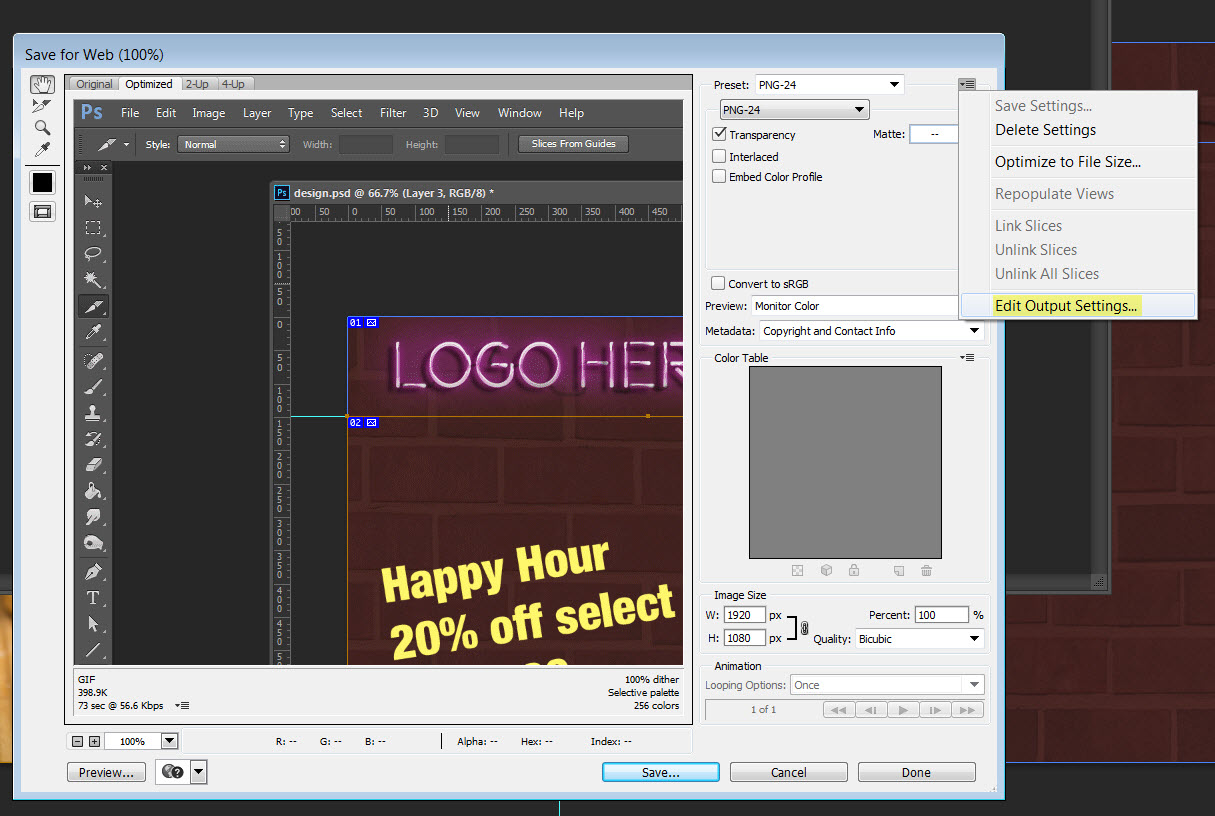
- Select Edit Output Settings… to open the Output Settings window.
- With HTML selected from the dropdown list, select Output XHTML. Then click Next.
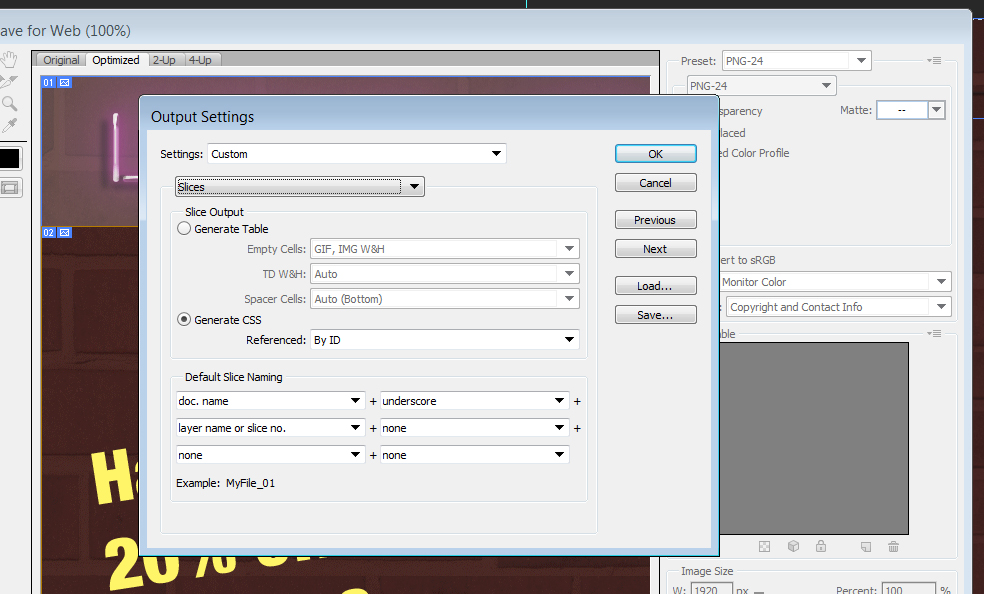
- Under Slice Output, select the Generate CSS option.
- Click OK to close the Output Settings window, then click Save to generate the HTML template.
Editing the HTML for BrightPlates
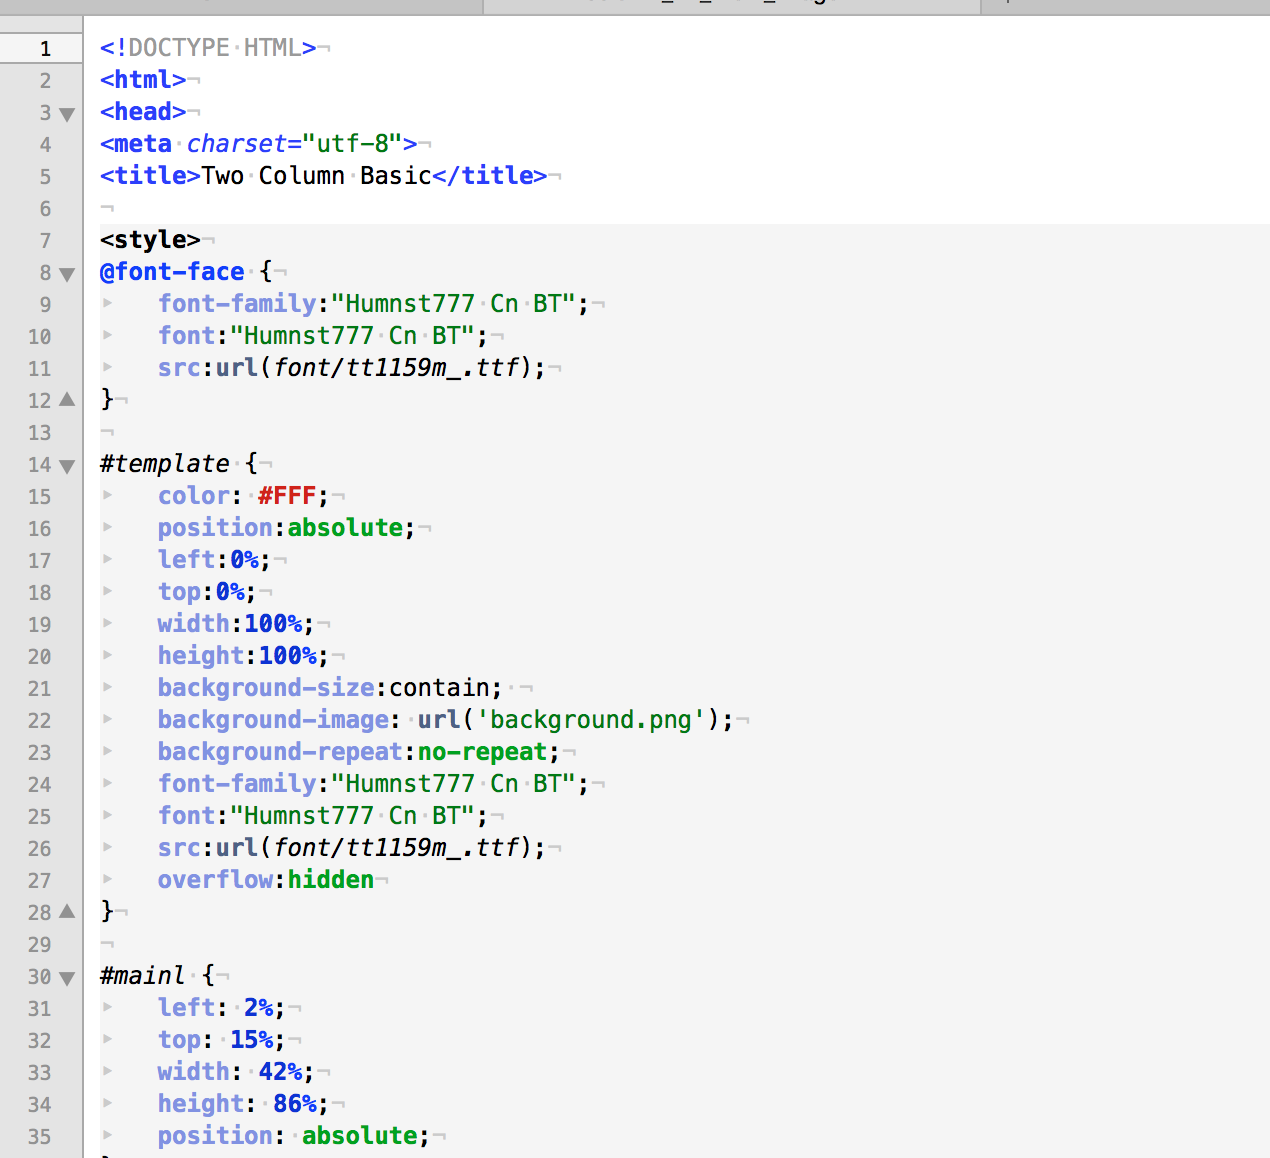
- Open the generated .html file using an HTML editing application (e.g. Dreamweaver). If you don't have such an application, use a plain text editor (e.g. Notepad, Textedit).
- Edit the
bodyelement in the CSS section to include a desired font family. Photoshop will not include fonts from the saved template by default. - Create a CSS id named
#templateand include the properties and values as shown in the screenshot below. Ensure the following:- The
positionisabsolute. - The
widthandheightproperties are 100%. - The
background-imageproperty matches the name of the background image saved as part of the page files by Photoshop.
- The
- Navigate to the
<body>portion of the HTML. Notice that the HTML body consists of a number of<div>templates that correspond to the slices created in Photoshop.
(Optional) If you want the background image of the template to be customizable in BrightPlates, you will need to add the following to the
<body>tag:data-template-background="background.jpg"
- In the
<div>tags that correspond to editable images, enterdata-block-type="image"in the tag. - In the
<div>tags that correspond to editable videos, enterdata-block-type="video"in the tag. - In the
<div>tags that correspond to dynamic data, enterdata-block-type="mrss"in the tag. Because BrightPlates always uses Live Media feeds, you will need to specify the block type as"mrss"even if the feed only contains text. - For each item in a dynamic data
<div>, do the following:Create a
<div>tag for the item formatted as follows. The other <div> elements created in steps b through e will be placed within the boundaries of this <div> element.<div data-block-item="mrss"> </div>
If the item contains an image, create a <div> tag formatted as follows:
<div data-item-media="image" class="itemImage" />
Note
Video via MRSS is not supported in BrightPlates templates.
Create a <div> tag for the title formatted as follows:
<div data-item-type="title" class="itemTitle" />
Create a <div> tag for the description formatted as follows:
<div data-item-type="description" class="itemDescription" />
Below the <div> tag for the description, you can add any number of custom data fields by adding additional <div> tags. The data-item-type of the <div> should equal the name of the custom field in the BSN Live Media Feed (created using the Add Custom Field button in the WebUI). For example, a custom field named "Caloriecount" in the Live Media Feed would correspond to the following:
<div data-item-type="caloriecount" class="itemCaloriecount" />
Important
We strongly recommend stating the maximum character limit for item titles, item descriptions, and custom data fields in the default text. This will help the end user create dynamic text that does not get cut off when it is displayed in the template.
Building Templates for HD/LS Players
HDx24, LS424, HDx23, LS423, and HDx22 players support BrightPlates presentations, but these models have a single video decoder (rather than the two video decoders offered by the XD, XT, and 4K models). This leads to several limitations that you need to consider when creating a BrightPlates template:
- The template can either have one video
<div>tag or a set of MRSS<div>tags. - By default, a video decoder is used to display the background image (this ensures it is always placed behind other content); however, on single-decoder models, there will be no decoders left to display MRSS content. To work around this limitation, you will need to do the following:
- Add the
background-color:transparentproperty to the<div>tag for the playlist/MRSS block. - Ensure the background image is a .png with an alpha channel for transparency, and add a transparent window that is the same size and location of the playlist/MRSS block.
- Add the
<div id="playlist" style="position:absolute; left:400px; top:100px; width:500px; height:800px; background-color:transparent; z-index=0 " data-block-type="dynamic-playlist">
Additional Steps for Portrait Templates
If you've created a portrait template for BrightPlates (e.g. 1080x1920, 720x1280), you will need to include the background image as a landscape image. BrightPlates will automatically rotate the background image after it's uploaded:
- Locate the background image in your template.
- Open it with an image editing application (e.g. Photoshop).
- Rotate the image 90 degrees counterclockwise.
- Save the image.
Note
Preview images for the template can remain in portrait orientation.
HTML Best Practices for Templates
Please note the following when creating and testing BrightPlates templates:
- The BrightPlates template uploader does not perform error checking on the HTML/CSS code. Test your template thoroughly before uploading it.
- We recommend creating templates that contain fewer than 100 files. If the template contains close to 100 files, the average file size should not exceed 650-700 KB. The template upload process may fail if these limits are exceeded.
- Each browser treats fonts slightly differently: We recommend testing your template on a BrightSign player (rather than just the browser on your computer) to ensure that text is not truncated or misaligned.
- We recommend using absolute positioning—with percentages—for all elements.
- We recommend using inline CSS styling.
- Avoid nested
<div>elements whenever possible.
Uploading the HTML Template
- Take a screenshot of the HTML page in your HTML authoring application or web browser. Save it as "preview.jpg" in the same folder as the HTML page.
- Place the HTML page, background image, preview image, and any other related content into a .zip folder.
- Navigate to http://www.brightplates.biz/.
- Log in to your BrightPlates account.
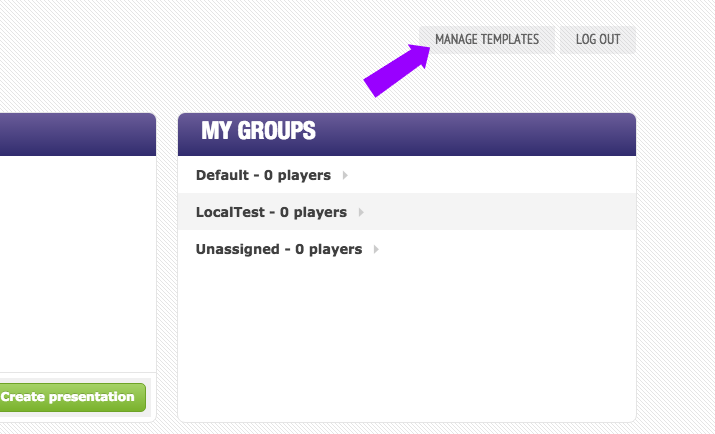
- Click Manage Templates in the top-right of the page.
- Click Upload new template. This will open the Upload Template window.
- Click Browse to locate and select your .zip file.
- Enter the name of the HTML template file in the Template filename field (e.g. index.html).
- Select the Category (i.e. vertical) to which the template belongs.
- Specify the Orientation of the template.
- Enter a Title for the template. The title will be visible in the Templates browser in the BrightPlates UI.
- Enter a Description for the template. The description will be visible when the template is selected in the Templates browser.
- Uncheck the Enable JQuery box if you are new to creating BrightPlates templates. This option enables advanced data parsing and server interaction.
- Click Upload to upload the template to BrightPlates. It will be visible in the Templates browser momentarily.
Note
If you're encountering errors when uploading a template created on a Mac, see this FAQ for more details and a workaround.
.png?version=1&modificationDate=1459468170000&cacheVersion=1&api=v2&width=300&height=359)